Cover

Cover
Showing posts with label DIY Projects. Show all posts

Friday, December 16, 2016

DIY Friday!

It's Friday again! That means another DIY Farmhouse Fix for Less!! 

Today's project is less about the step by step of this specific project, and more about getting you to think outside the box with the things in your own home to transform them into something more functional for your lifestyle! :) 


So, when we moved our new house in September, our entertainment center was an older one that was my parents at some point, and had traveled with me through both undergrad and gradschool dorming, housing, ect. It had seen better days, but it had been a trusty TV, Playstation 4, and Nintendo 64 holder (ya know, the essentials) for quite a while. Chad decided to build a GORGEOUS entertainment center for our new home, so naturally, our sad little old one was of not much use anymore. 


It sat in the guest room for quite a while not doing a whole lot, but after we started our entry way project, I knew I wanted a bench to go underneath that. One day I was putting things away in the guest room and sat down on the entertainment center just for a break and realized it was perfect bench height!


So I asked Chad how feasible it would be to make this old entertainment center a bench, and he said we could give it a shot!

So we popped off the top and took off the glass doors. 

Chad then cut plywood to fit the size of the door opening and attached framing the replicate a barn door look. This plywood piece slid right in where the glass doors previously were.

Then we took 2, 2x12's and cut them to the appropriate length, put a brace on the bottom, and hinges on the back so that we could store things in the bench!

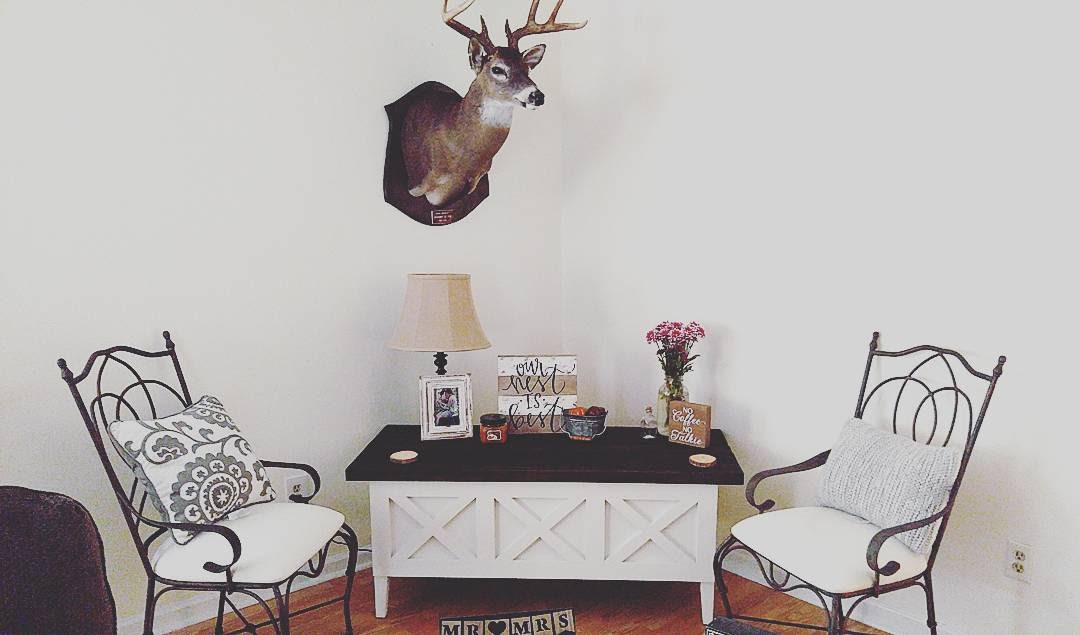
With some dark brown stain for the top and some Antique White paint for the body, we had a repurposed entertainment center that was now a bench! 


Unfortunately, when we put it in the hall way, it didn't quite fit the vision we had for an entryway bench; it was just a little too wide! 


So we found a new home for it as a cute nook coffee/reading area and I store all my seasonal decor inside of it!

I know that this DIY wasn't super specific with instruction, but like I said, its more about getting you to think outside the box with the pieces you already have! :) Whether its repainting, re-covering, re-finishing, antiquing, aging, whatever it may be! Take a look around your home for things you can put a new twist on and repurpose :) 

Happy Friday y'all! <3


Friday, December 9, 2016

DIY Friday!

Woohooo!!!! Happy Friday Loves!!! 

Look who has their DIY Friday post up ACTUALLY on Friday! #Winning 

Soooooo this week's projects is SUPER easy, but SUPER worth it if you're into that wall art! 

What you'll need: 

- A long, narrow piece of wood
- Paint (I used white and black)
- Sponge brushes
- Stencils
-120 grade sandpaper

In the boutiques in our town, there are TONS of rustic signs you can get to hang on your wall that have the town name, or say "Kitchen" or "Farmhouse", etc. like the ones below: 


And they sell for anywhere from $40-$80 a piece! Even more sometimes if you want it personalized with your family last name or coordinates of a location.

I wanted a rustic sign that either said Farmhouse or Tallahassee, but just couldn't bring myself to pay that much for one!  Sooooo I made one :) 

All you need is a board to the size of your liking (mine is left over plywood from one of my husband's projects). Mine is about 5 feet long.


Next, I went to Hobby Lobby to get some BIG 10in stencils for the lettering... and they were $25... so I figured I'd wait a little bit and ended up finding some at Target for $3!!! I grabbed those, sponge brushes for $2, and black acrylic paint for $2. ($7 total)

We had white paint left over from our entertainment center, so I put a white-ish coat of paint on the face of the board, let it dry, then got to stenciling! I am still getting used to documenting my projects, so I apologize for the lack of photos for each step! I put the stencils down (no, I did not tape them, the not-so-perfect letters where the paint bled a little added to the rustic look!), and sponge painted the letters with the black paint and let that dry. Then I took the 120 sand paper and sanded the whole thing, lightly. 


You can see the scratches and distressing in the paint! Which I thought was enough. Sand to your liking though :) 


You can see the stencils, sand paper and sponge brushes in this picture, so I didn't completely photo fail! 

Then we hung it up! Ta-da!!! A custom $80 rustic wood sign for $7 :) 


Now the more I look at it, the more I think I want to sand ours a little more, ha! 

Anyway, enjoy!! :) 

I'd love if ya'll posted your signs below if you make one :) 

Happy Fri-yay! <3


Friday, November 25, 2016

DIY Friday!

Hey everyone! It's DIY Friday again, Black Friday at that, so lots of fun things can be picked up today for DIY projects!! Take advantage ;) 

This week's #FarmhouseFixForLess is for our outside entry way! Not too long ago, we had picked up some pallets to make a bench for our inside entry way... but they ended up being a little too dirty to have as inside wood, so they needed to be an outside project! 

As you have seen, the inside of the Buckley house is in full swing Christmas, however our outside entryway was still very Fall-ish... pumpkins and all! Soooo, we had to make the outside match the inside and make some Christmas trees! :) 

Here's what you'll need: 

-Old Pallets
-An Angle 
-A Saw
-And possibly a husband, ha! 


First we took the old pallets and the hubs used the angle to draw the cut lines. These were what our pallets looked like! 


This is the angle we used! 


The steepness of the angle is dependent on how big or how small you want the Christmas trees! We made one bigger one and one smaller one! Once your lines are drawn, you can get to cutting! My husband (black shirt) made the first one, then taught his cousin how to make the next one. 


They left the bottom of the trees straight across so they could sit on their own! Here's what they look like! 


Aren't they adorable?! With some fire wood, pinecones and a basket full of mini pinecones, we're ready for Christmas! 


Now the debate is, to flock them with snow, or not to flock them with snow.... decisions, decisions! 

What do y'all think?! 

Happy DIY Friday! 

Friday, November 18, 2016

DIY Friday !!

So I totally dropped the ball last week with my DIY Friday ! So here we are with a #FarmHouseFixForLess !

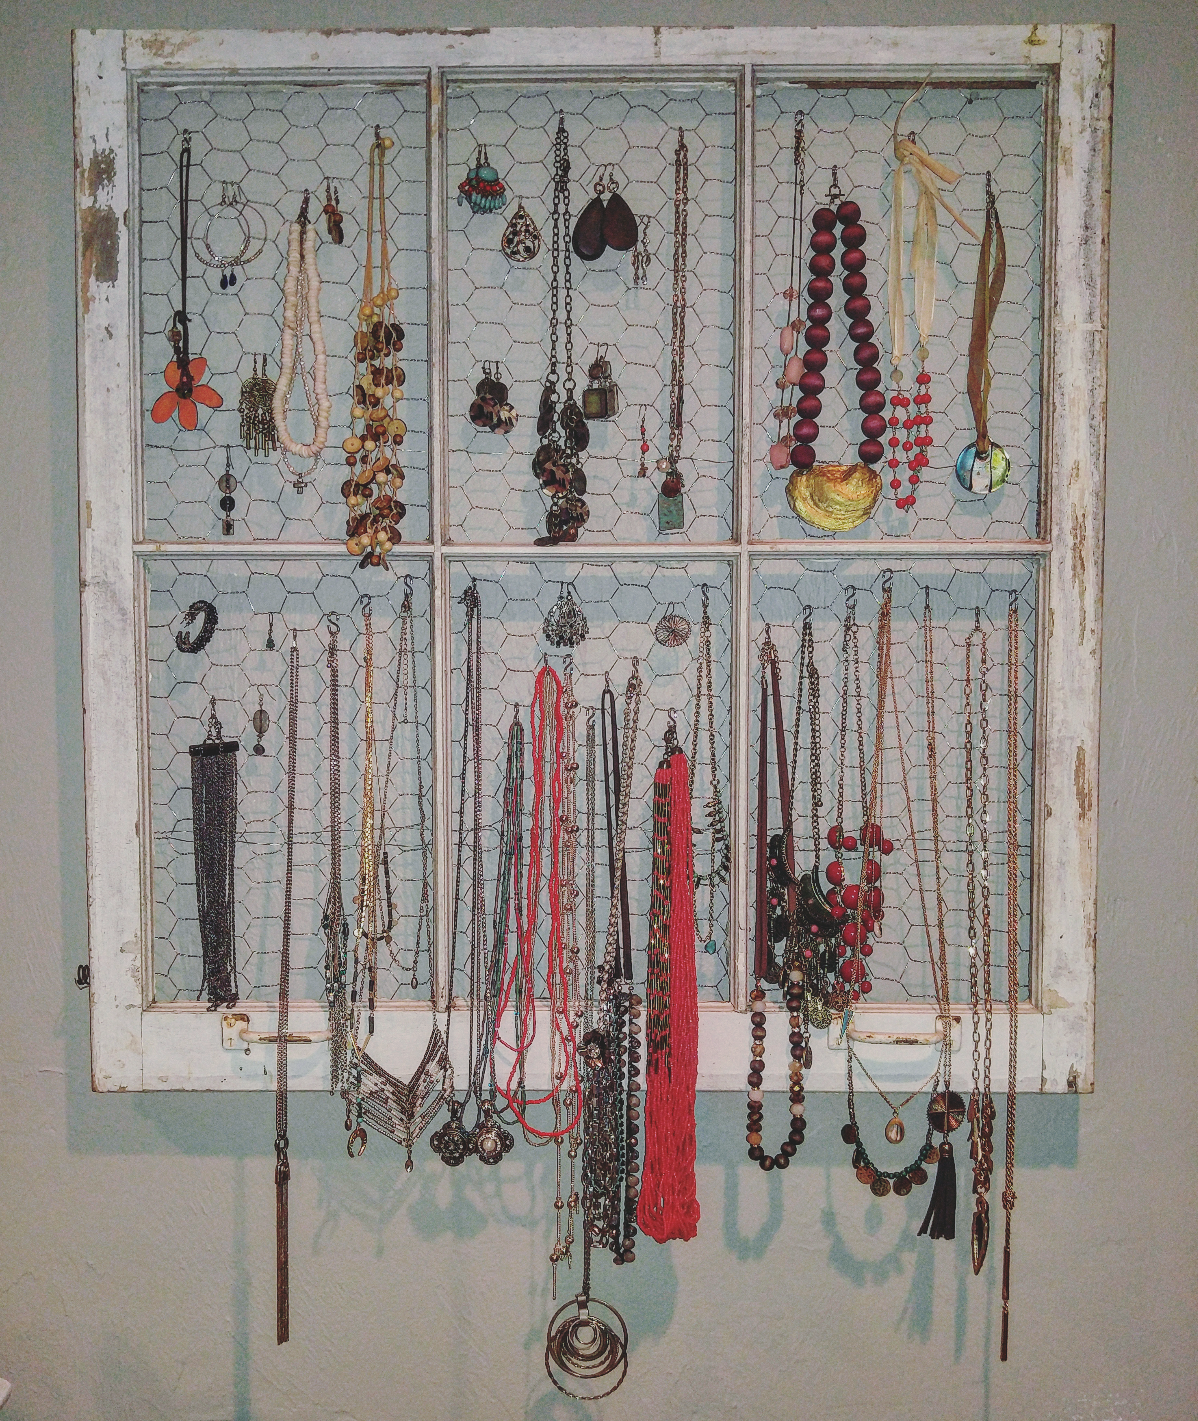
Some of you remember me going to the French Country Flea Market last month and I was able to find some really neat old reclaimed wood windows so I got creative with one of them.

I have A LOT of jewelry, ya know for the rare occasion that I'm not wearing gym clothes, and what I had been using to hang it just wasn't cutting it !

So here's what happened:


I took one of the larger windows that had one of the panes broken , and knocked out all the glass (which was a lot harder than I thought it would be!)


The a flipped it over and stapled 1in chicken wire ($3 from Lowes/Home Depot) on the back of the window !


Then I found these tiny little S-hooks at Lowe's for $2 and spread them around on the chicken wire. They're perfect for necklaces !

Then I hung all my jerewly on it !


Ta-daa!

You can do this with a picture frame too if you don't have a window !

Happy Friday :)

Friday, November 4, 2016

DIY Friday!!

We got married in September and closed on our house the week before the wedding, so not only are we newlyweds, but we are also new home owners and I've had a BLAST decorating and turning our house into a warm, cozy home!! We've been up to a lot of DIY projects, so I figured on Friday's I'd share a project we had done for our farmhouse themed home, on a budget! 
Introducing DIY Fridays #FarmHouseFixForLess style ! There is a fun hashtag that goes around on Instagram on Tuesdays too, if you want to play. :) 

Anyway, today I wanted to share the beginning of our entry way! Now I'm the Pinterest queen... I would literally have zero decorating sense without Pinterest or Instagram, ha! So naturally scrolling around Pinterest I found rustic entry ways, and they all, in some way, had shelving of some type at the top with hanging options, and then a bench of some kind at the bottom for storage and fun pillows, of course! So I wondered off to Hobby Lobby and I began the search for shelving. 

Unfortunately, shelves are really flipping expensive! (at least the farm style ones I wanted were.) So I left the shelf section and wondered around the decor section to stumble upon these old tool boxes!


I thought they were neat to begin with, but after I looked at them for a little bit, I thought "what if I flipped them upside-down and made them a shelf?! Then I could hang something from the bottom of them!" Naturally, I'm a very visual person, so I had to lay it out. I wandered over to the knob/hanging section in Hobby Lobby and found some hooks.

UMMMMM YES!!!! PERFECT!!!! So I grabbed two toolboxes ($20), 8 hooks and headed out the door for a fraction of the price of just ONE normal shelf!

I got home and my husband asked if I had any shelf luck. I opened the trunk and whipped out these bad boys (holding them as toolboxes), full of excitement for my cheap, creative find and he kinda just looked at me funny, waiting for an explanation. I let him know that I need him to hang these upside in the entry way and then we're going to add hooks! "It was a super cheap steal babe, way cheaper than a shelf!" (that's all he really need to hear and/or cared about). So up went the two upside down toolboxes and we attached the hooks..... TA-DAAA!!! :) 


I'm obsessed! Toolboxes, hooks, and decor are all from Hobby Lobby! Now its time to find or build the perfect bench for underneath it :) 

Happy DIY Friday! :)